Our goal is to make sure you’re completely satisfied with your adoption. I know that sounds funny but think about it. It is a living thing that you bring into your home. I will help you with every step to help you have a great harvest.
Please view our Veteran Guarantee.
I will help you with the planting, we just ask you to give the plants a couple of weeks. I will guarantee my plants if you use our instructions. My veteran guarantee is for 30 days upon receiving the plants.
DO NOT return dead plants, I will make sure you are happy with your purchase. I have no problem replacing plants for free. Check out our Guarantee.
Do not start them in full sun Outside if your current weather is in the 80s or above. You cannot start a bare root outside if it is in the 80's. When the plant is outside you have to put mulch on the soil. Do not cover the crown with any mulch. A hard wood mulch is good. Do not use straw, pine straw, hay, cut grass as a mulch. You will loose plants. They are quite vulnerable for the first two weeks and are best started away from direct heat. Note: The roots come on the drier side and you can soak the roots for an hour. Make sure to only soak the roots, leaving the crown and sprouts above the water.
Plant in something that is at least 8 oz or 3" container. Fill the container completely full and then plant your plant. Make sure the crown is above the soil and container lip. The crown needs good airflow. When there is high humidity around them you will see the leaves curl and die. When you go to a strawberry picking farm you see them on raised covered rows. That is key.
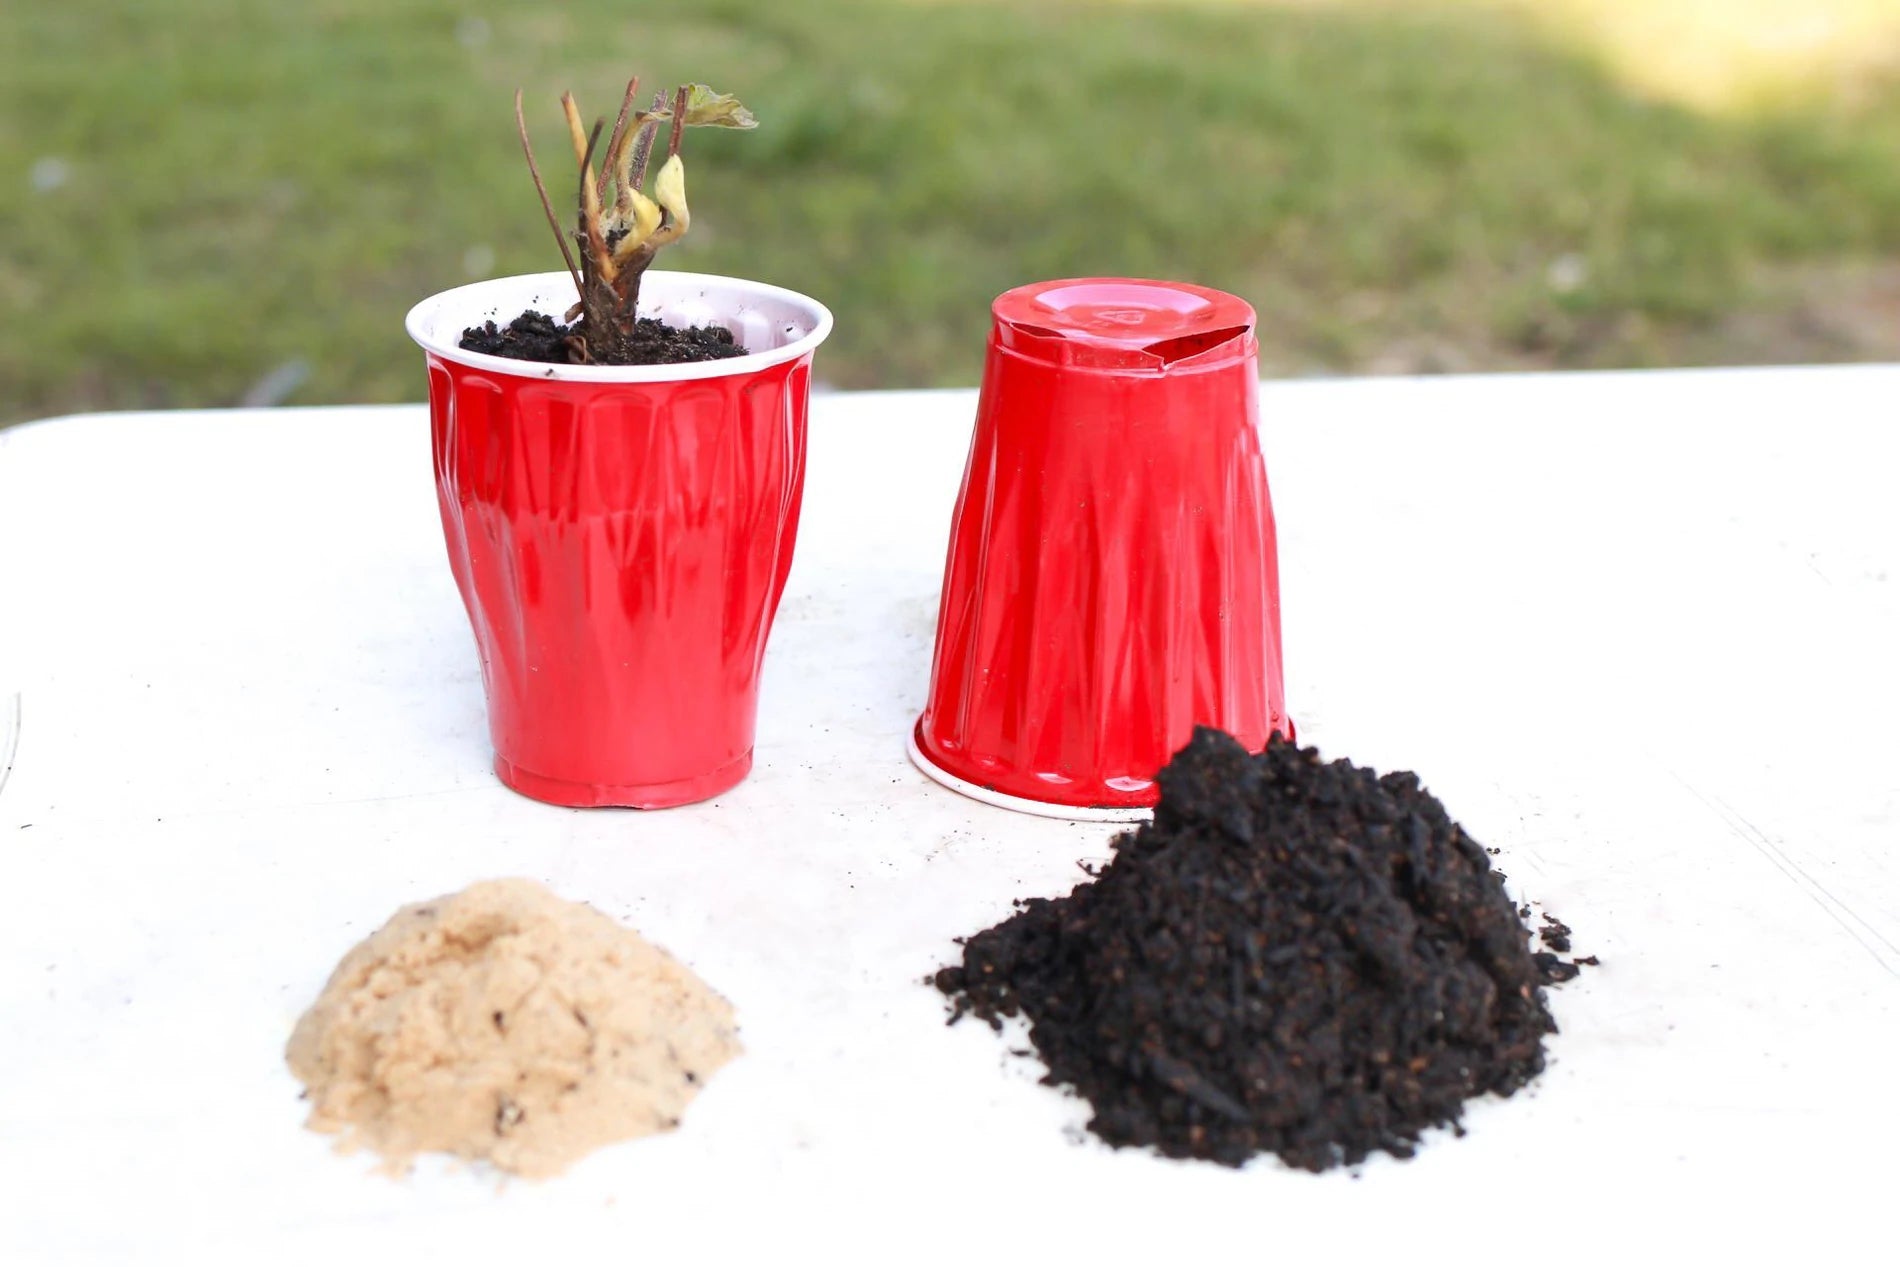
You cannot start them outside in rows of plastic or fabric as bare root. Outside with black fabric makes it a very hot enviroment and your plants will stress and start to die. They just need a consistent environment like starting a seedling turning it into a plug as farmers do and then transplant them outside. Acclimate them for a couple of days also first. You can always send pictures to the number at the bottom of the home page and text me pictures of your planting so I can help you further. We have a great video but it has some outdated pieces. Like putting them into a glass cup with plastic. Not needed and to much room for error and stressing plants at the beginning. So go straight to planting.
YOUTUBE VIDEO: Skip step #3, the glass cup step. It is not needed, please skip to planting them in pots.
DO NOT PUT PLANTS IN THE GLASS CUP WITH PLASTIC BAG. SKIP THIS STEP!!!!

Soil: Ideal soil pH is 5.5-6.5. Strawberry plants need well-draining soil. Choose a good quality potting mix that has perlite mixed in. You will then want to add in about 1/3 play sand to mix in with your potting soil. This will create a well-draining, nutrient filled soil that your strawberries will love! We recommend to always check your soil's pH. Always hydrate your soil before planting. Potting soil can kill a plant if it is not well hydrated. Potting soil is made to absorb moisture. If your root is the only moisture because of a dry pocket around the plant. The soil will suck the moisture out of the plant.
Environment: Then need a consistent environment to get started. Just like planting a seedling. You are creating an established plant to be able to drink and feed the plant. Called feeder roots. If you soil dries out for a second. Feeder roots that start to grow will die. They are very sensative. If you have to plant outside. You have to mulch the top of the soil Do not cover the crown. This will help the top 2" of soil from drying out.
Water: If you are starting them indoors , you may only need to water about twice a week. Outside in a place that only gets sun till 1pm, you may need to water every morning. Once the plant starts to grow it will let you know if it is happy. Once they are outside in full sun, then you will need to adjust your watering to accomadate the direct sun that will cause their soil to dry out at a faster rate. Mulch is key.
Transplanting Outdoors: Once the plant has grown a few new stems, you may get ready to start transitioning them outside. Usually this will be about two weeks after planting. For the first two days you will want to place them in a shaded area outdoors. These first two days will allow the plant to acclimate to the humidity and temperature of their environment first. And then each day after that you may begin to move them into a little sun and little more each day after that until they are in their permanent home. Be sure to mulch them before starting the transplanting process so their soil may retain the moisture when you water them.
Outdoor Planting or Containers: When planting outdoors the soil has to be protected with mulch or fabric.
Mulch: a hardwood mulch, no grass, straw or leaves. This protects the top 2" of soil from drying out that can kill the strawberry quickly in the beginning growing process.
Fabric: Must be tight against the soil. Air gaps will create heat pockets and kill what is in the pocket. Like the crown. The crown has to be up and out and above the fabric.
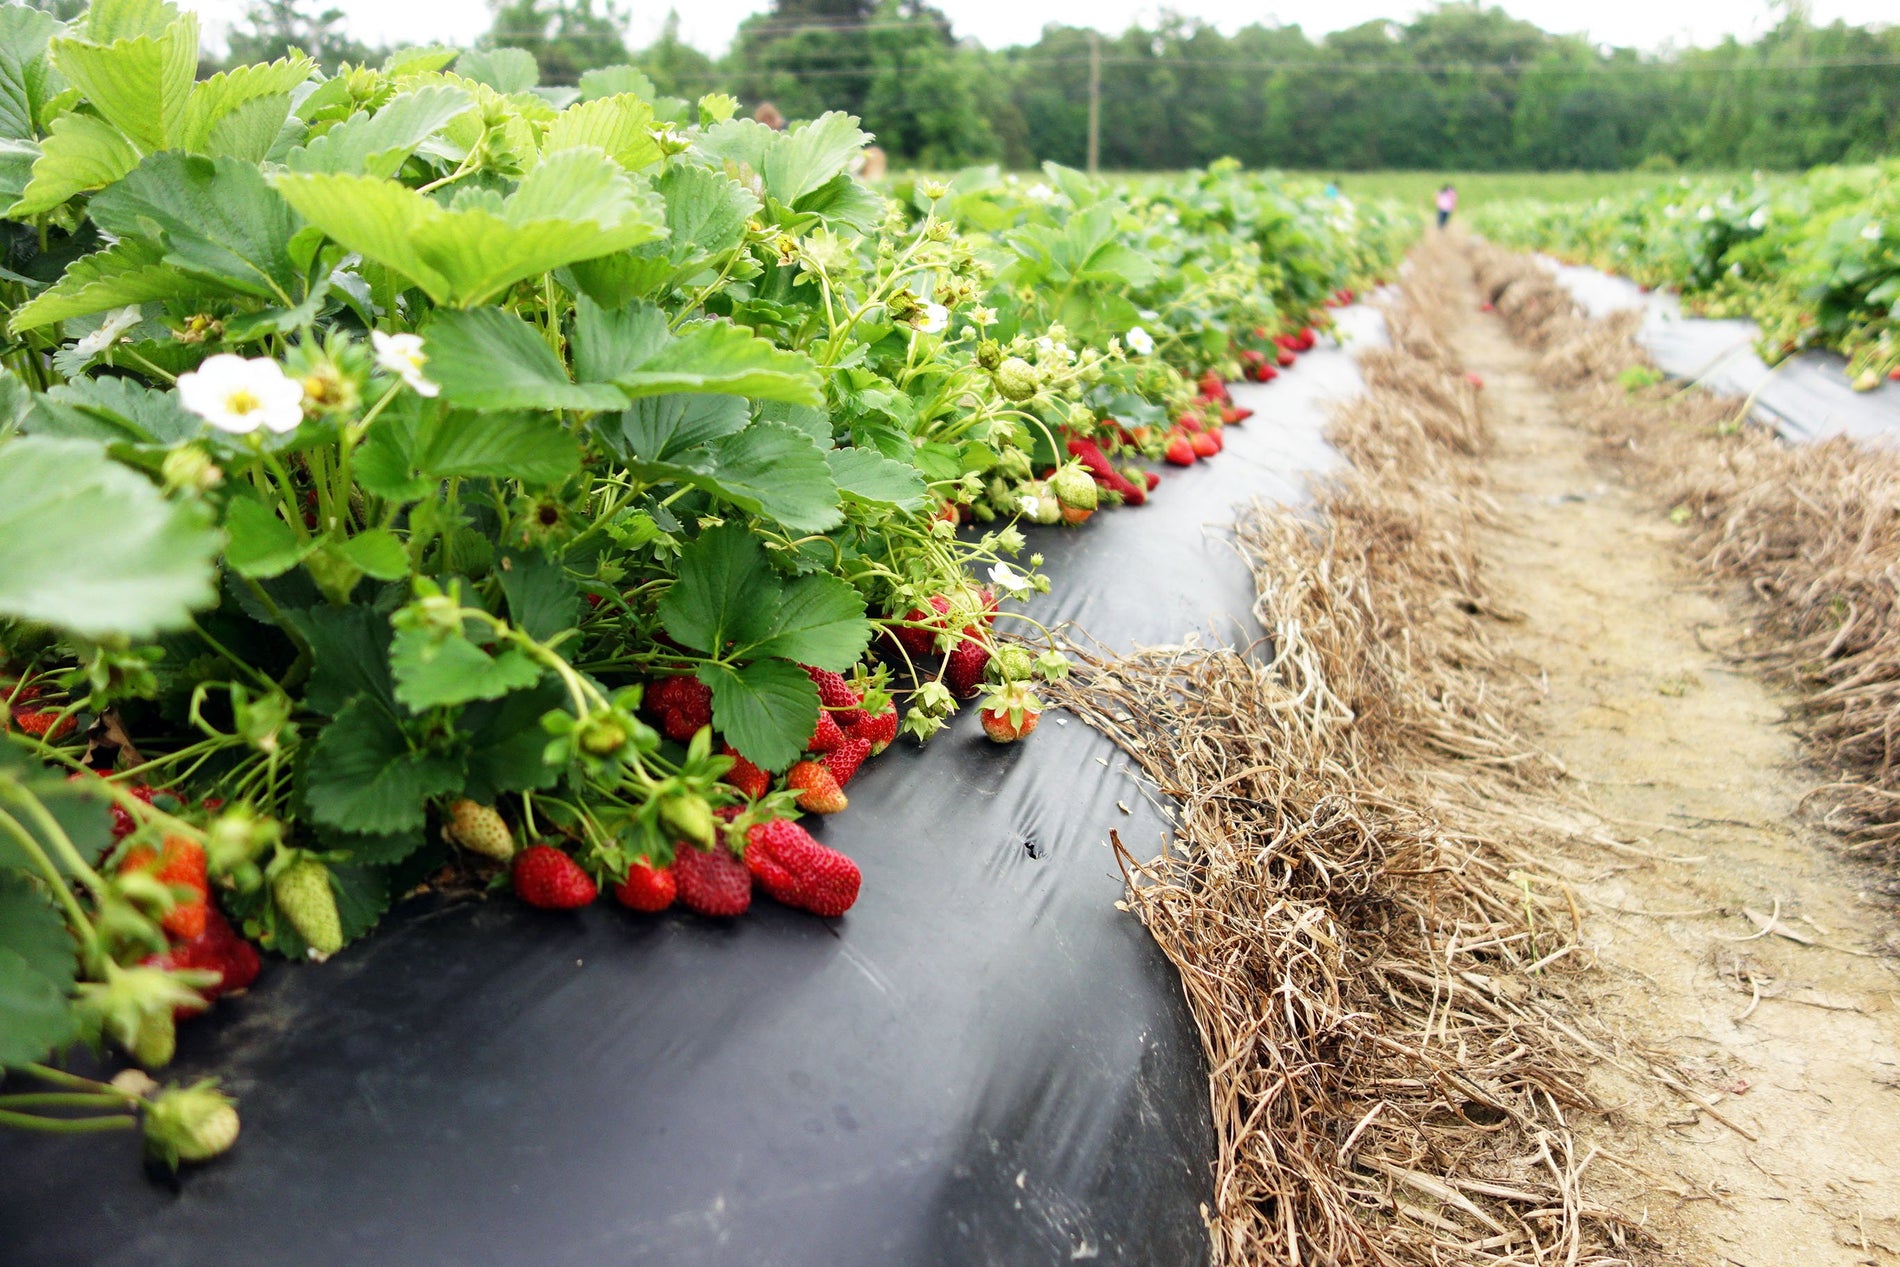
Outside planting for best results: plant on raised covered rows like you see at strawberry Picking farms, LIke the PIcture. Plant them 6-8 inches apart. Unprotected soil can dry out fast and make it hard to maintain proper moisture.
Hanging Bags & Crates:
I would Not put them in any kind of Hanging Basket or Bags to start them. This is because when being planted in a vertical planter, the plant will not be upright with gravity, so every time you water your plants, water will drain down over the plant and its crown. It also removes soil from the hole exposing the root and drying them out. It is best to get them established first then transplant. Started this way we cannot Gaurantee our plants.
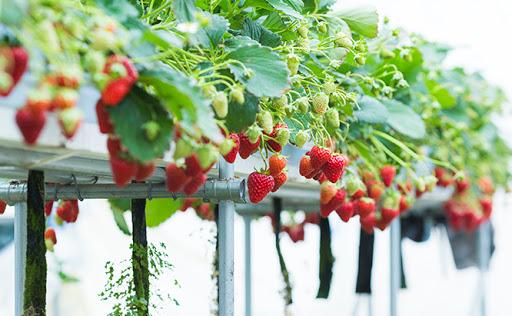
Wick, Water Culture, Ebb and Flow, Drip, NTF, and Aeroponic
Plant placement: The Strawberry plant has two important parts the roots and crown. Both of them should never be in standing water. I recommend cutting roots to about 2 inches. Then putting them in the medium you are using. The crowns do not need to be in the medium. The main killer of strawberry plant are root and crown rot. You will see growth within 3 days. If you do not there is something wrong.
Medium: All these systems can work but they have rules that need to be followed for bare root strawberry plants. The medium you use is very important because as mentioned above the roots need to breath. Rockwool, perlite, vermiculite are not a good medium and can kill the plant. Volcanic pumice is my favorite medium because it does not over saturate the roots. Clay pellets are also good but you have to use a net pot at least 2” or bigger. Smaller pots will not cover all the roots.
Solution: pH range 5.5-6.0 for optimal results, up to 6.5, the three primary nutrients required by strawberries are Nitrogen, potassium ,phosphorous. Also, substantial amounts of calcium, magnesium and sulfur, are also needed, as well as hydrogen, carbon and oxygen you will naturally get through the air and water.
Growing Environment: Growing Strawberry plants hydroponically requires low humidity with good air flow because strawberry plants are prone to powdery mildew in high humidity environments. Temperatures should be around 65 - 75 degrees F with 12 to 16 hours of light is optimal. June bearer strawberry plants are not ideal for growing strawberry plants hydroponically. They have a shorter harvest time and would be a waste for your system unless you know that in two months you need to put something else there.
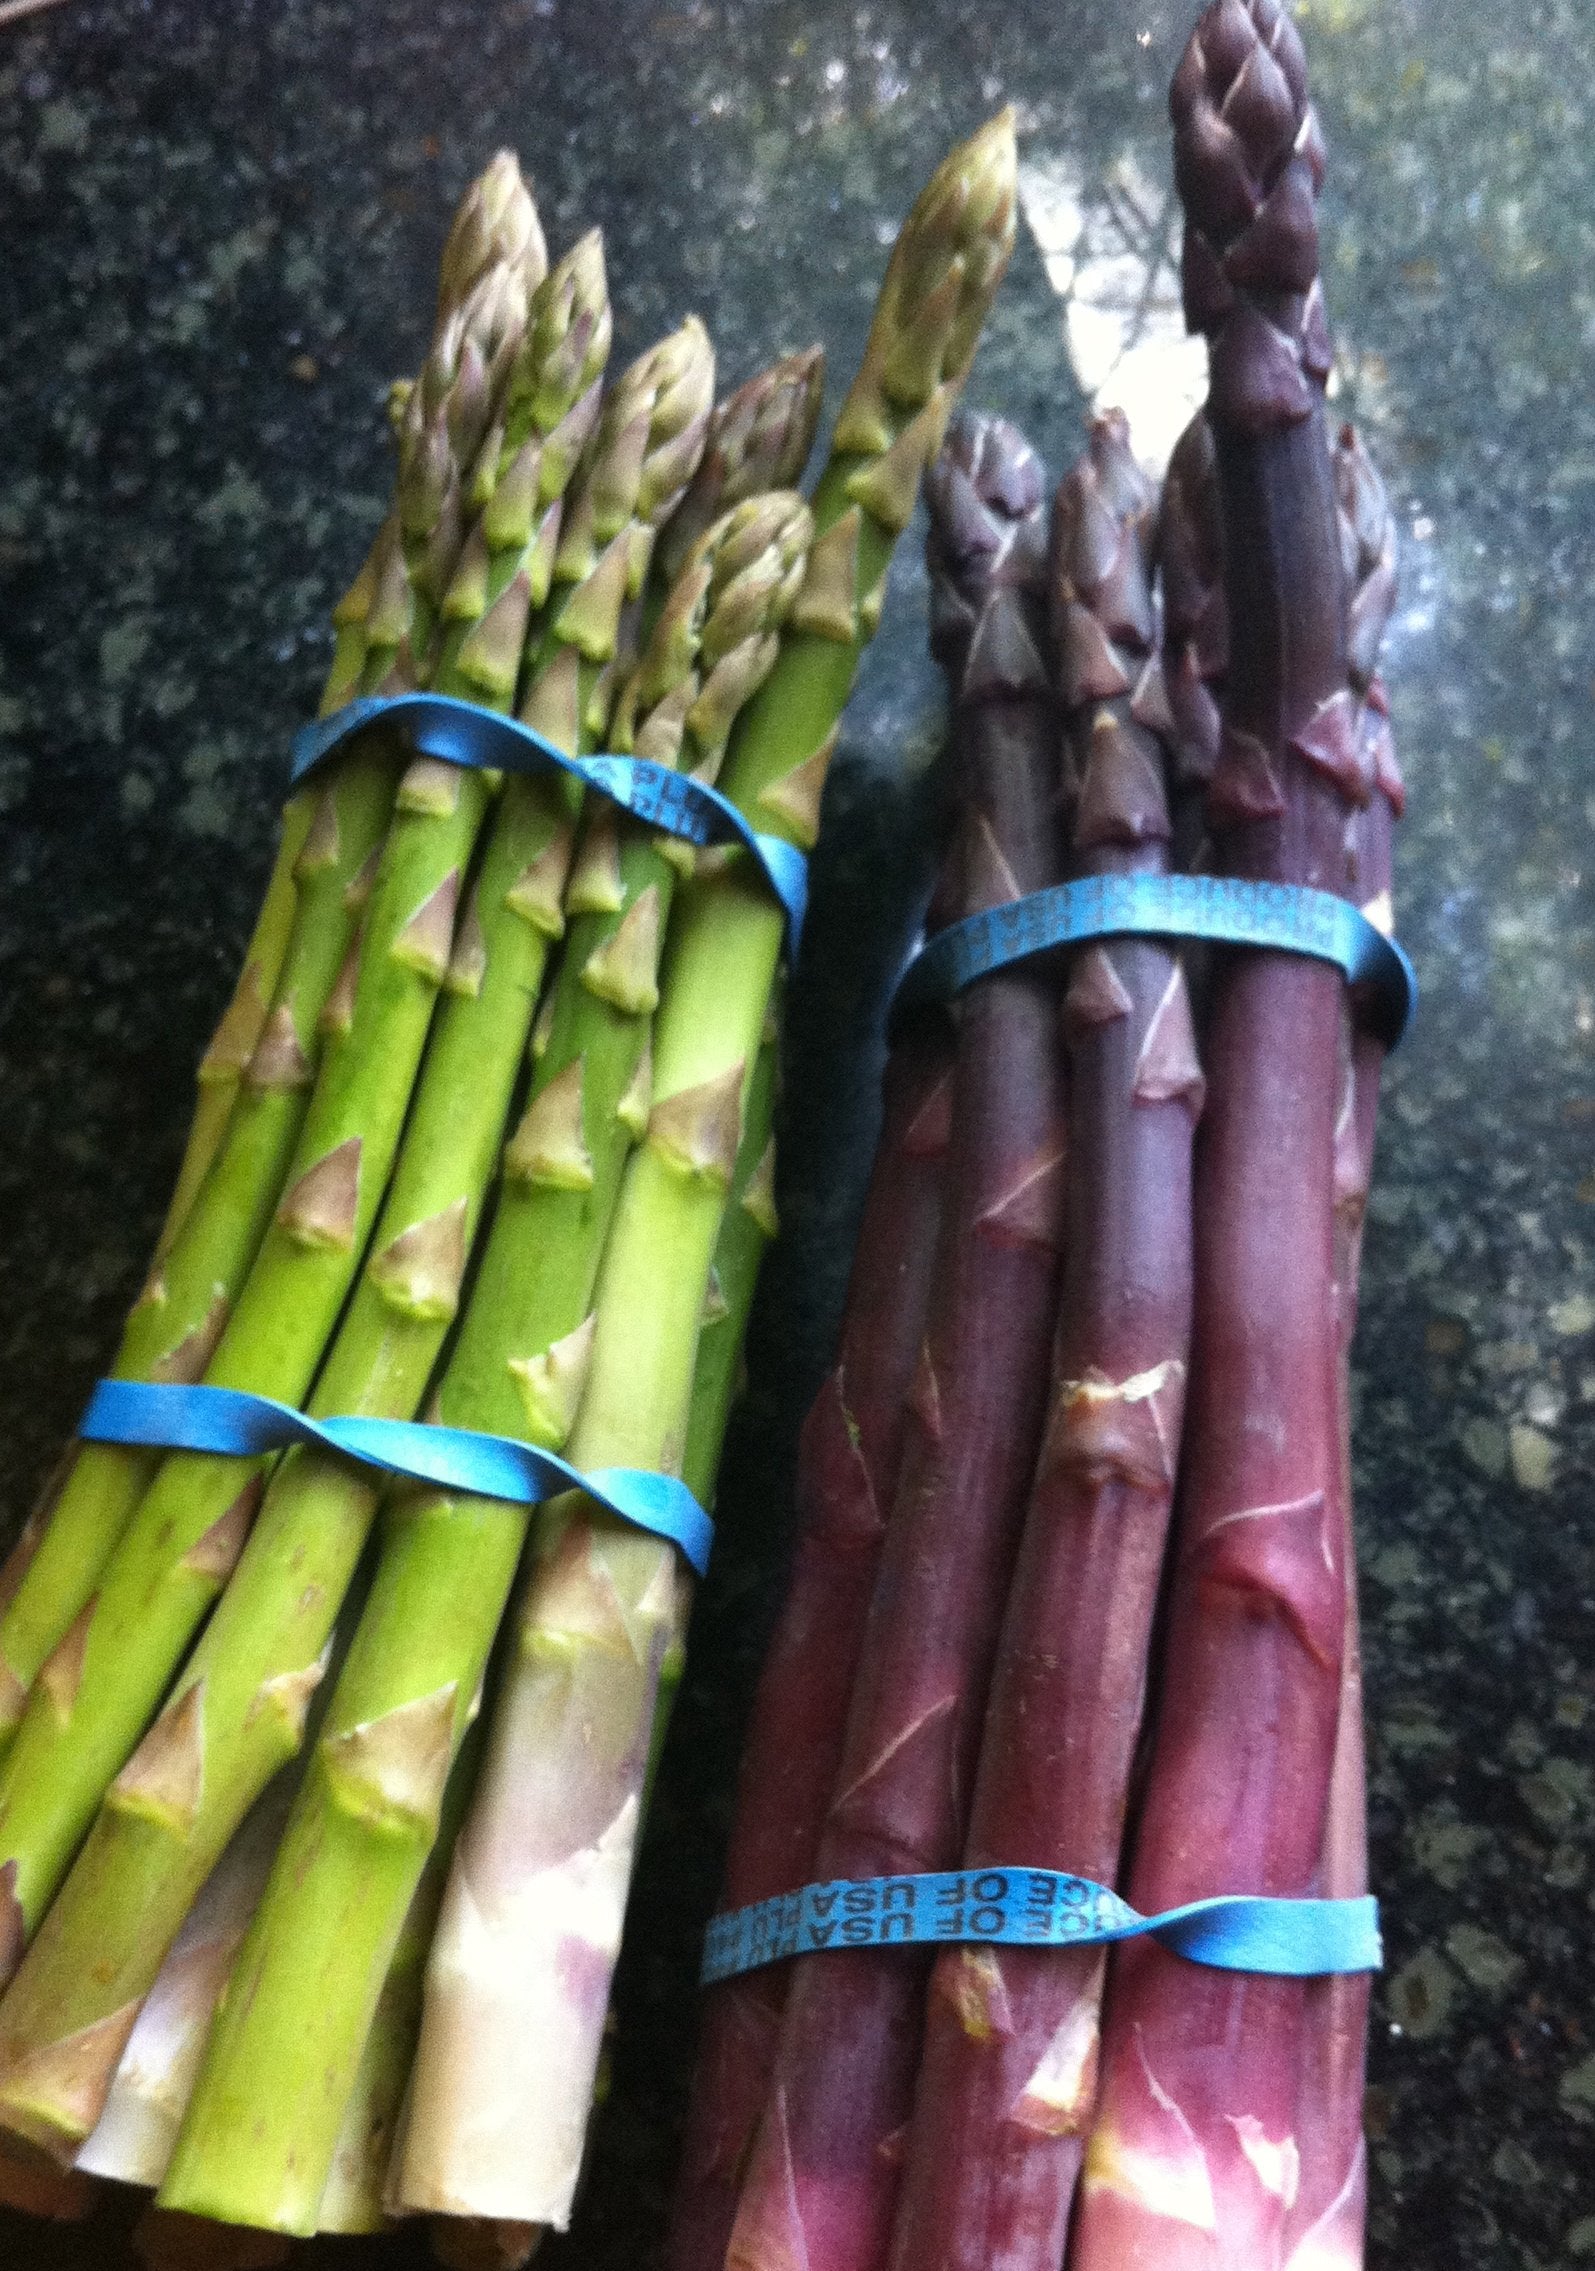
Our asparagus plants are highly productive, two-year-old, large-graded crowns grown in managed nursery conditions, hybrids resistant to fusarium crown rot, asparagus rust and other diseases. Asparagus plants can live up to 25 years so make sure you find the perfect place to plant them. When you receive them take them out for the plastic bag immediately. If you cannot plant right away, then you can put in your fridge for up to two weeks. Just make sure to put roots in a paper bag to help control the humidity and place in your fridge. Sometimes the roots will arrive with some mold but that can happen during transit. Just rinse off and let them and let them air dry so the roots are not wet. Wet roots can create mold.

It doesn't matter if you are planting in a raised bed or the ground. Below are the soil, spacing and watering requirement. IF you want to put in containers I recommend a very big container of 10 gallon or bigger. Just know that containers are hard to maintain 365 days a year for 25 years. You will dig a trnch
Soil: You need well-draining soil and I recommend 30% sand mixed into the soil. Using rich compost or potting soil will retain to much water and rotten the roots. Most commercial grower grow in 50 to 70% sand. With the proper portions you do not need to layer the soil just dig and bury. Last thing P.H. needs to be 7.0–7.2. Not all soil is created equal. Must check it.Also add 1lbs of 10–10–10 feritilzer per 20 sq ft.
Spacing: Space your plants 12” apart and 12” deep. Each row needs to be 2 to 3 feet apart. They need good air flow for the ferns to do their job.Now Purple asparagus you can actually grow closer together. You can plant 8" apart and get more in per row. One rule if you are going to live at your location for a short period. Plant the closer together to get a better yield. One inch per year you will live there.
Watering: Asparagus plants do not need to be watered as much as you think. These are 12” below the surface and they collect moisture all over. If it doesn’t rain within 4 days, then water well. A raised bed I would knock that down to 2 days.
Over Watering can cause them to not start and rot. If plants do not grow in 3 weeks, dig them up and look at them. If the roots crown are solid. It might just be a moisture issue or temperature issue. But for long periods of high moisture they can rot. During winter you want it to be on the dryer side. Freezing can make them crowns burst if it freezes.

Now you have them planted and have to make sure they grow and flourish for the next 25 years.
Fertilization: In establishment year dress in August with 1/4 lb 10–10–10 per 20 sq ft and work into top 2" of soil and in following years ½ lbs 10–10–10 per 20 sq ft in early spring and again following harvest. Lime, bone meal, and super phosphate help maintain proper soil levels but always check your levels.
Harvest: The first year you get these in the ground, grab a snack. If you see a nice spear enjoy it. Just leave a couple to fern out. The plant needs the fern to grow bigger and stronger. Next year grab 30% and the year after 100%.
Troubleshooting: The biggest problem with asparagus are moisture problems. It can cause so many problems such as: root rot, pest problems, and many diseases. Your soil should have moisture but not be moist. If you see your soil being moist on the surface it is much worse 12” below the soil. So if you live in an area that receives a lot rain or is in a lower area with heavy clay you need to amend the soil and ad more sand. The next thing is it could just be still to cold. Soil temperature needs to be at least 70 degrees to grow.
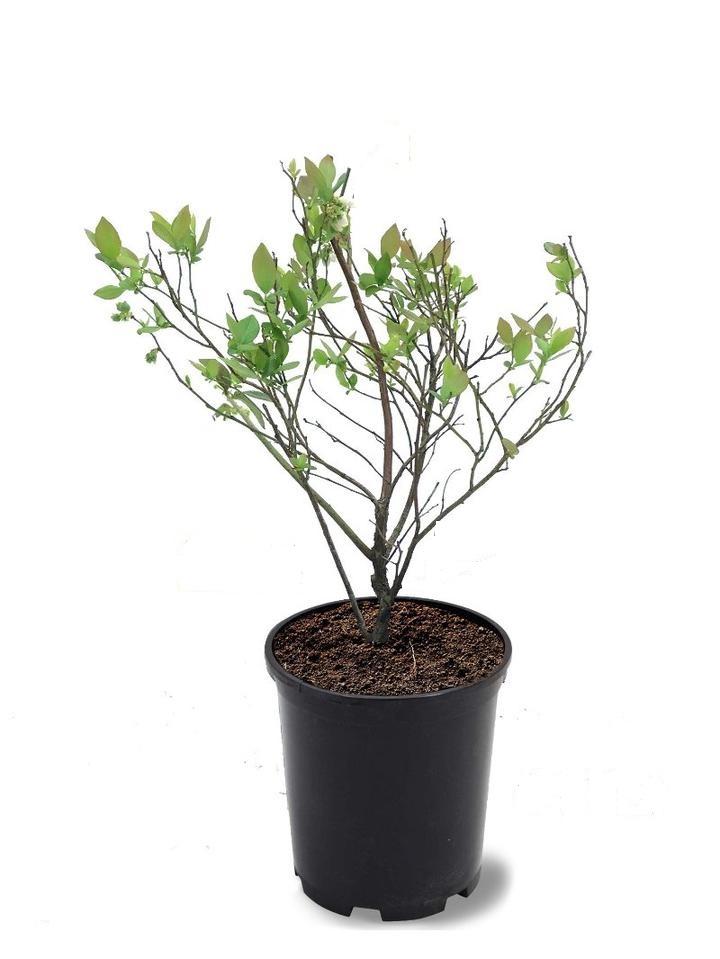
You will receive your blueberry plant bare root without the container. You can soak them for an hour if you like. Spring is the best time to plant blueberries, planting in fall is ok but is recommended to plant in containers. Blueberries need ridiculously acidic soil. Although most sources give a range of 4 to 5.5, they really don't like a pH higher than 5; and they will quickly join The Choir Invisible in soil with a normal pH. For spacing: 4’–5’ and between plants 8’–12’ between rows. So excavate their planting area as deeply as your muscles allow, use a garden fork to break up the clay at the bottom and refill the hole with equal amounts of milled peat moss, compost and any native soil you have that doesn't look like clay.
Mulch the plants with an inch of peat moss, an inch of compost on top of that and then some well-shredded leaves. As always, don't let any mulch actually touch the plants. Like azaleas and rhododendrons, blueberries are shallow rooted and water hungry, and you'll need all members of that mulch combo to keep moisture in the soil and prevent competition from grass and weeds. You must check your pH to test the soil around your blueberries. If a yearly mulching with naturally acidic materials like peat moss and shredded oak leaves can't keep the pH low enough, you'll have to turn to sulfur. It's natural and lowers pH well, but it takes a long time to become active in soil, so ideally you'd apply it now if you know you're going to need it. (Heck; ideally, you'd apply it a year in advance!) Three-quarters of a pound of sulfur should lower the pH of 100-square feet of sandy soil one point; it'll take a full pound in clay soils. And pay attention to the plants; their color will tell you if they're happy with the pH or not. Nice deep green leaves are the best sign of pH success.
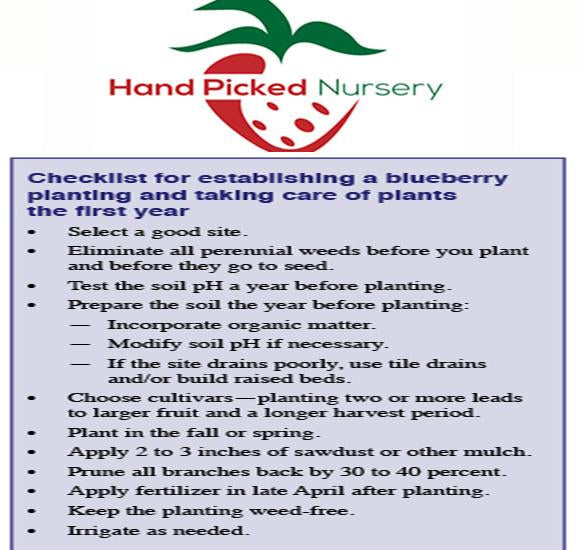
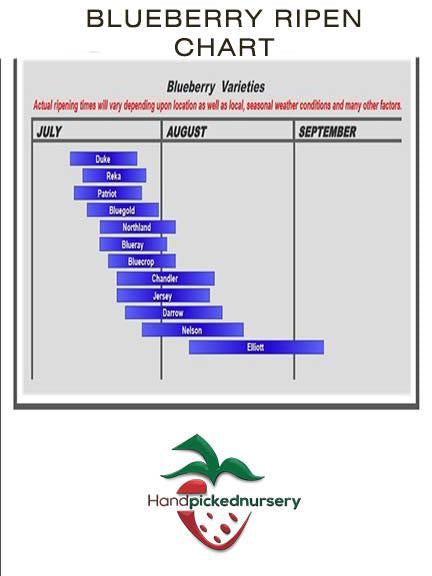
It is best to prune a blueberry bush for a larger harvest, because wouldn’t you want the best and largest amount of blueberries possible from their bushes. There anything better than a ripe sweet blueberry you picked right outside your own door! It seems so contradictory to cut off branches in order to get more fruit, but that’s exactly what we need to do with our fruit trees, especially blueberry plants. Pruning blueberries is slightly different than pruning fruit trees, though some of the principals remain the same. The best time of year to prune blueberries is in late winter or early spring. You want to prune them when the fruit buds are showing. Next, look at the bush. You want the middle of the bush to have good circulation and if it’s too compact the berries in the center won’t receive much light and won’t ripen well. Look for branches in the middle that don’t have any or very much new growth. Those will be the ones you want to remove. Be sure and cut the branch off down to the very base of the bush. This will encourage healthy new growth.
Raspberry plants from us it will come completely dormant bare root with no leaves. The roots can have some new growth. Once planted it will sprout shoots and branches within 3 weeks! The most important thing to make these grow is Humidity. They need a consistent environment to start growing. We will also show you how to duplicate the plants you receive. Use a good quality potting soil and mixed in 30% sand and blend well. Note: Soak your roots for a couple of hours. I 5 gallon bucket half full is a great way to start these. Just make sure it drains.
BLACKBERRY AND BLACK RASPBERRY
These will arrive as a large plug already growing. Plant anywhere unless it is 85 degrees or higher. Make sure the plug is a litter higher in the soil. The stem cannot tough new soil it will rotten and die. If it is hotter than this, we recommend planting them in a pot on a covered porch for a few days before slowly acclimating them into direct sun.
Raspberries:
If the weather in your area is above 85 degrees Fahrenheit, you will want to start these indoors or on a covered porch as well. Once planted, cut the raspberry cane to about 2" in height. This will help stimulate root growth to help send up new shoots! Then take those cuttings and put in a large freezer bag with a lightly moisten towel like you do a seedling and put by a window. Those will also grow. You can also do this to root.
1. Do not put in pure potting soil or add pearlite or peat moss. I would add at least 30% sand to the soil PH has to be around 6.5 and 6.8. Adding Peat moss will lower it and damage and stress the plant.
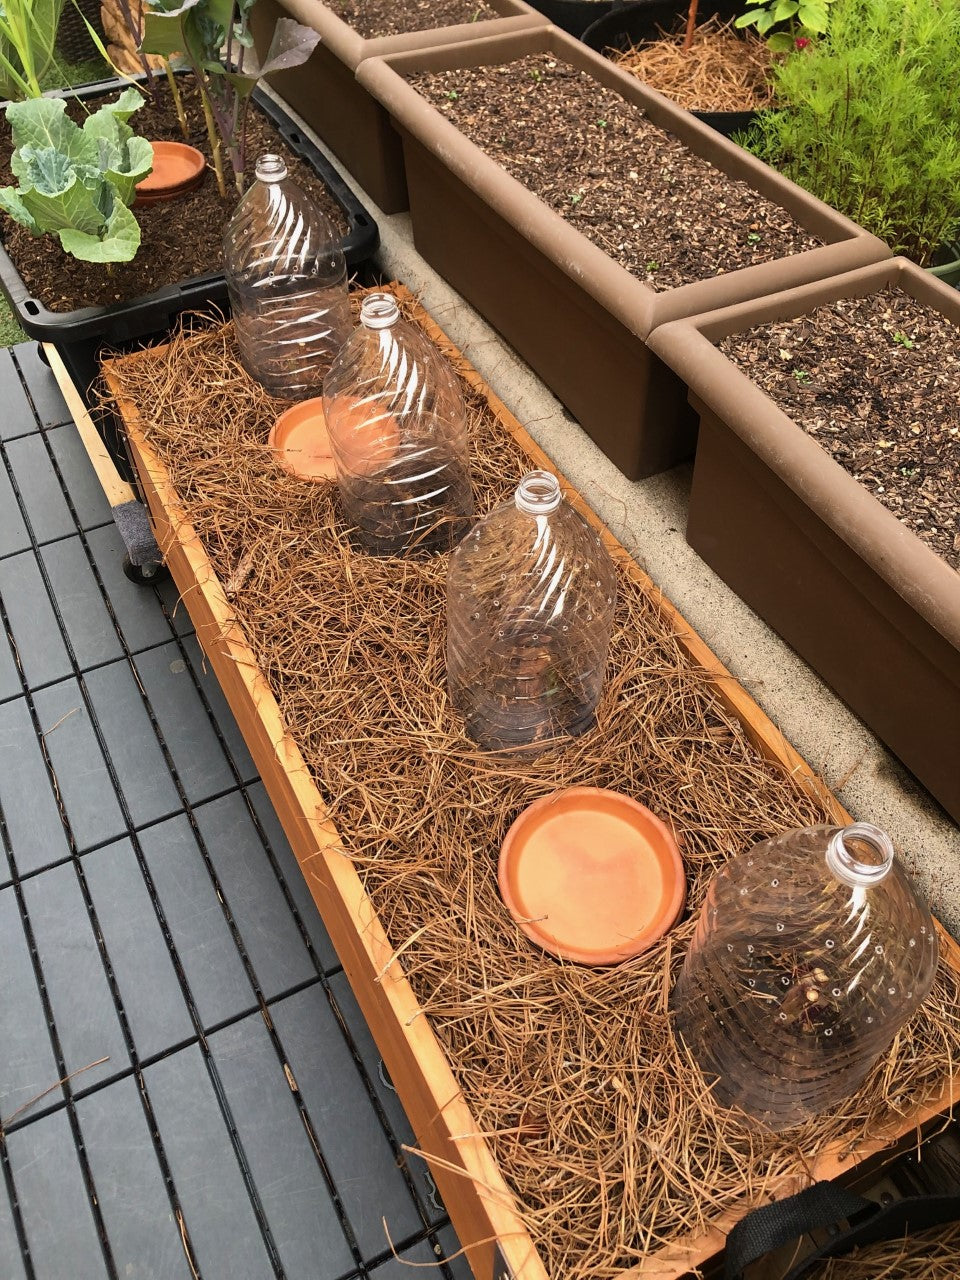
2. Do not plant outside in full sun, especially when it is hot. This will dry out the stalk and stress the plant. You can plant outside in a place that has only morning sun with the humidity wall around the plants like the picture to your left. It needs sun without the heat and good humidity to start. When starting plant and then cut 1" above the soil and mulch and then dome them as shown. Do not let it fog up a lot. That is to much humidity. Take the cuttings and put in a large freezer bag with lightly moisten towel and put cuttings inside. Put in a warm place that gets window sun but not to hot. Those will also grow.
3. Do not forget to mulch the top of the soil. If you plant it in containers, the top inch of soil can dry out fast and kill the plant.
4. The plants just needs a place with humidity, warmth, well-draining soil, mulch on top and sun light from a window or morning or late afternoon sun. If you have any questions just call so I can help. If it is below 80 degrees it can be outside in full sun. or sun to 2pm. Do not let the dome fog up. Put more holes. Within Two weeks, you should s
5. The humidity wall only needs to be 4 to 5 inches highs. Do not enclose like a dome. Will create too much humidity. If it fogs up there is to much humidity.
6. When they start to grow you can then begin cutting the humidity wall down an inch at time. All at once can shock the plant and kill the new growth. Acclimate over 4 days.
After about 10 days under the vented freezer bag you will see growth. Cut the top of the plastic bag off and leave the cylinder for 3 more days and then take it off. After another 5 days then slowly acclimate outside in shade first and then slowly move it toward the place you want to permanently want to place it.

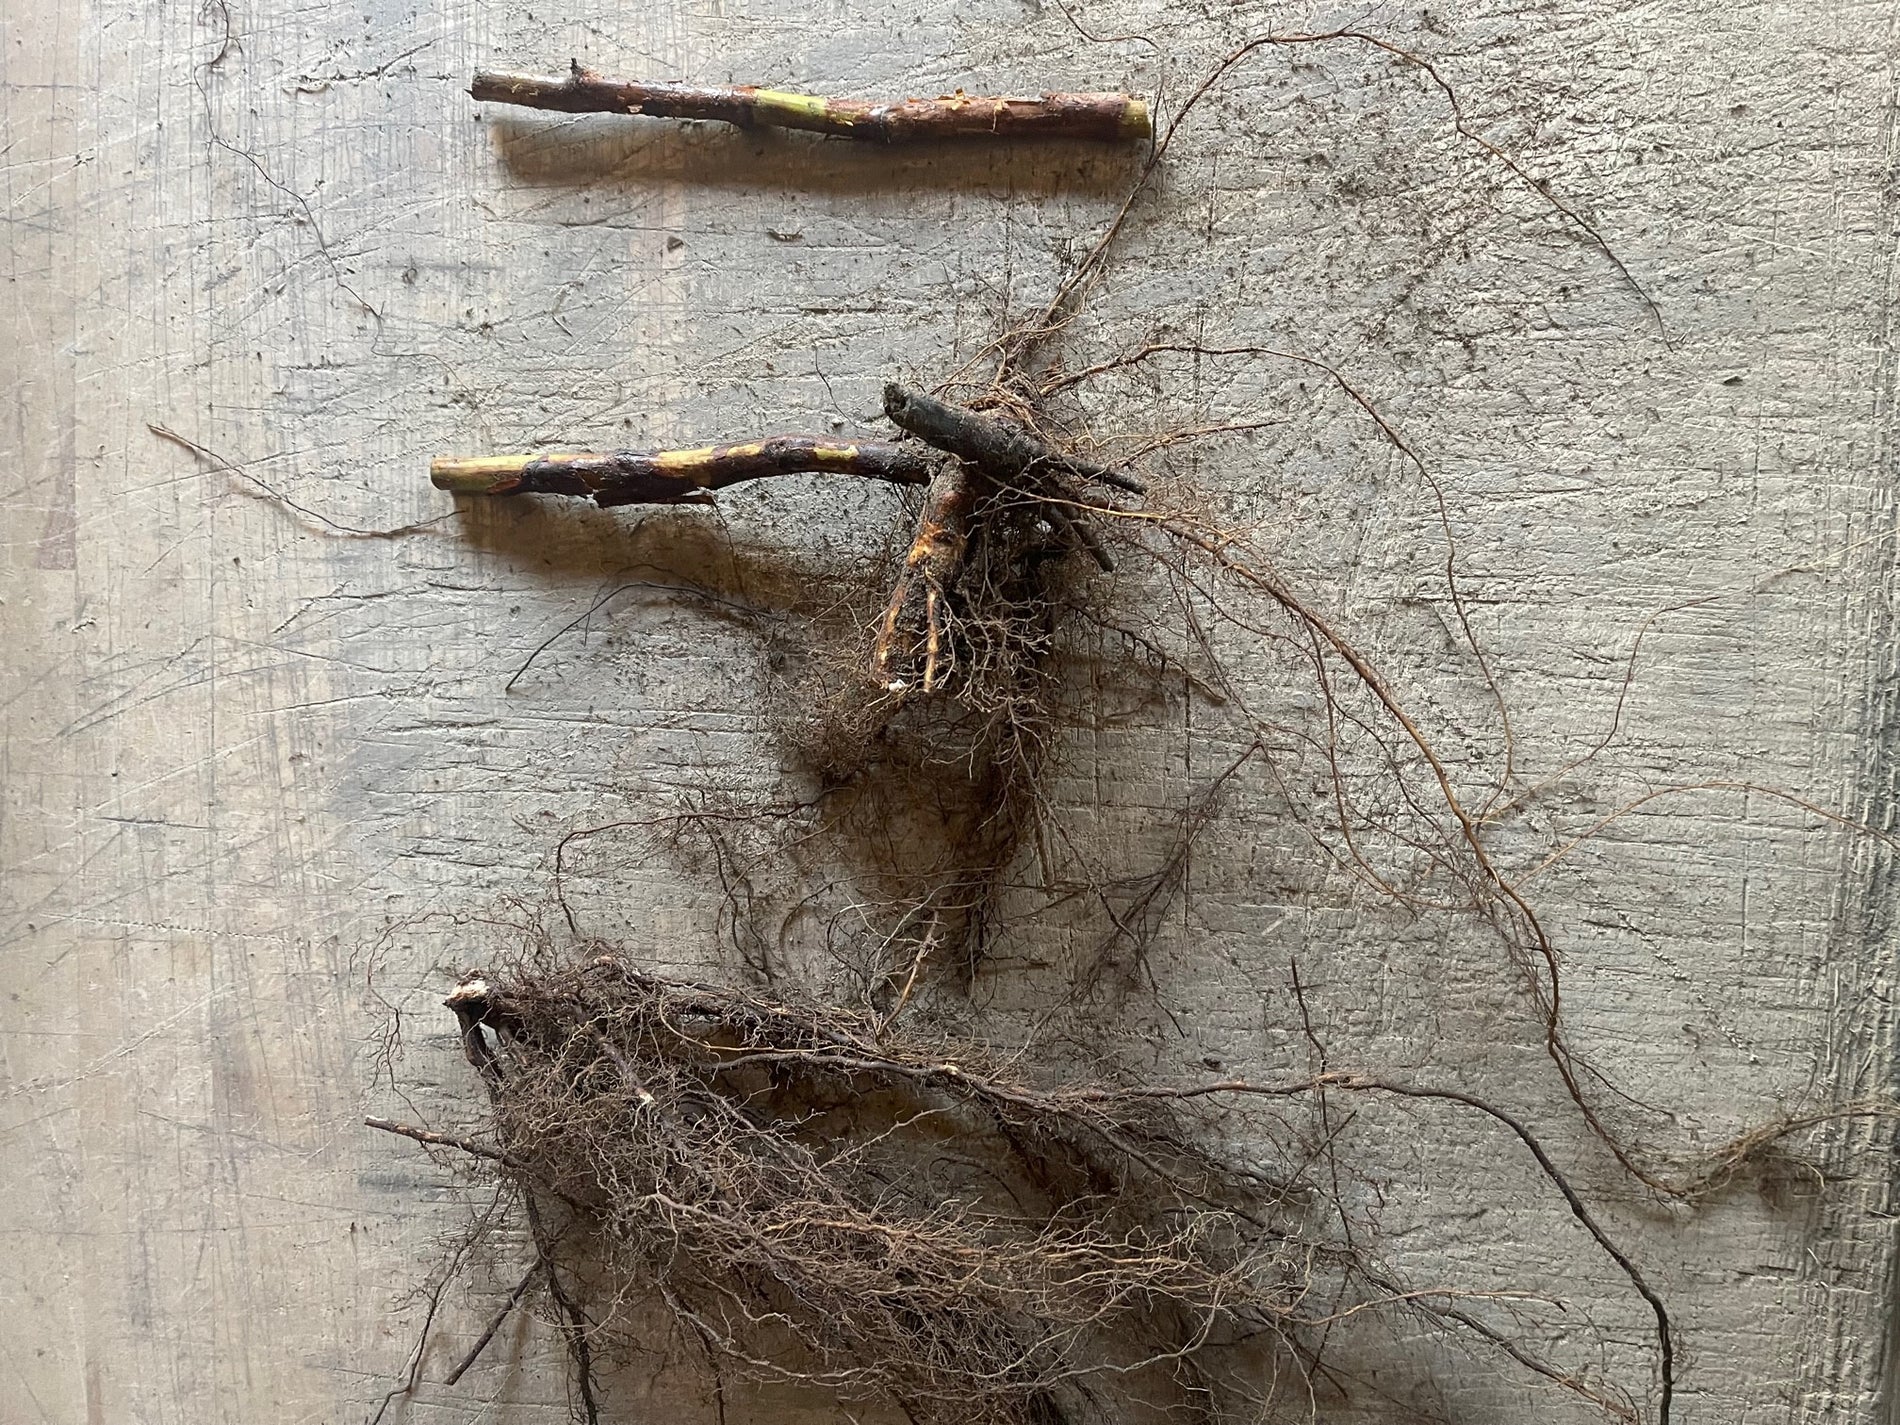
Planting Bare root trees or grape vine are so named because the plants are dug from the ground when they’re dormant ( and sometimes leafless) and their roots are shaken free of soil. Immediately upon receiving a bare root tree, I would remove it from its packing soak the roots in water for at least an hour. Roots that seem at all dry need to be soaked in a bucket of water for about eight hours. It’s best to plant bare root trees as soon as possible. Summer planting has to be planted completely out of full direct sun and heat. Morning and late afternoon sun is better. If you tree arrives with leaves that are dried or dead looking it does not mean your tree is dead but just the leave dried during transit. Just let the plant recuperate and it can take a couple of weeks to a month. When a plant is in shock it needs to establish new feeder roots before it starts to grow new leaves. One way to check is to pinch the skin near the soil and see if it is still green. But, that is also why we send an extra tree to help with your success.

For the first two weeks these need to be planted indoors. If there are no leaves, then no sun is needed. It will stress out the plant. For when transplanting outside, please put them in an area with only morning or late afternoon sun. You will also need to mulch the top of the soil. For the soil, use at least 30% sand mixed into the soil. Pure potting soil can damage bare root plants because it is too damp for new root growth. These small roots will drown and die if over moist for a period of time. Beyond the planting hole, I just spread these amendments on top of the ground; by the time roots extend this far, the lime or sulfur will have leached into the soil. Do not mix fertilizer into the planting hole, since it could burn new roots. And don’t add peat moss, compost, or other organic materials, or the roots won’t venture beyond the amended soil.

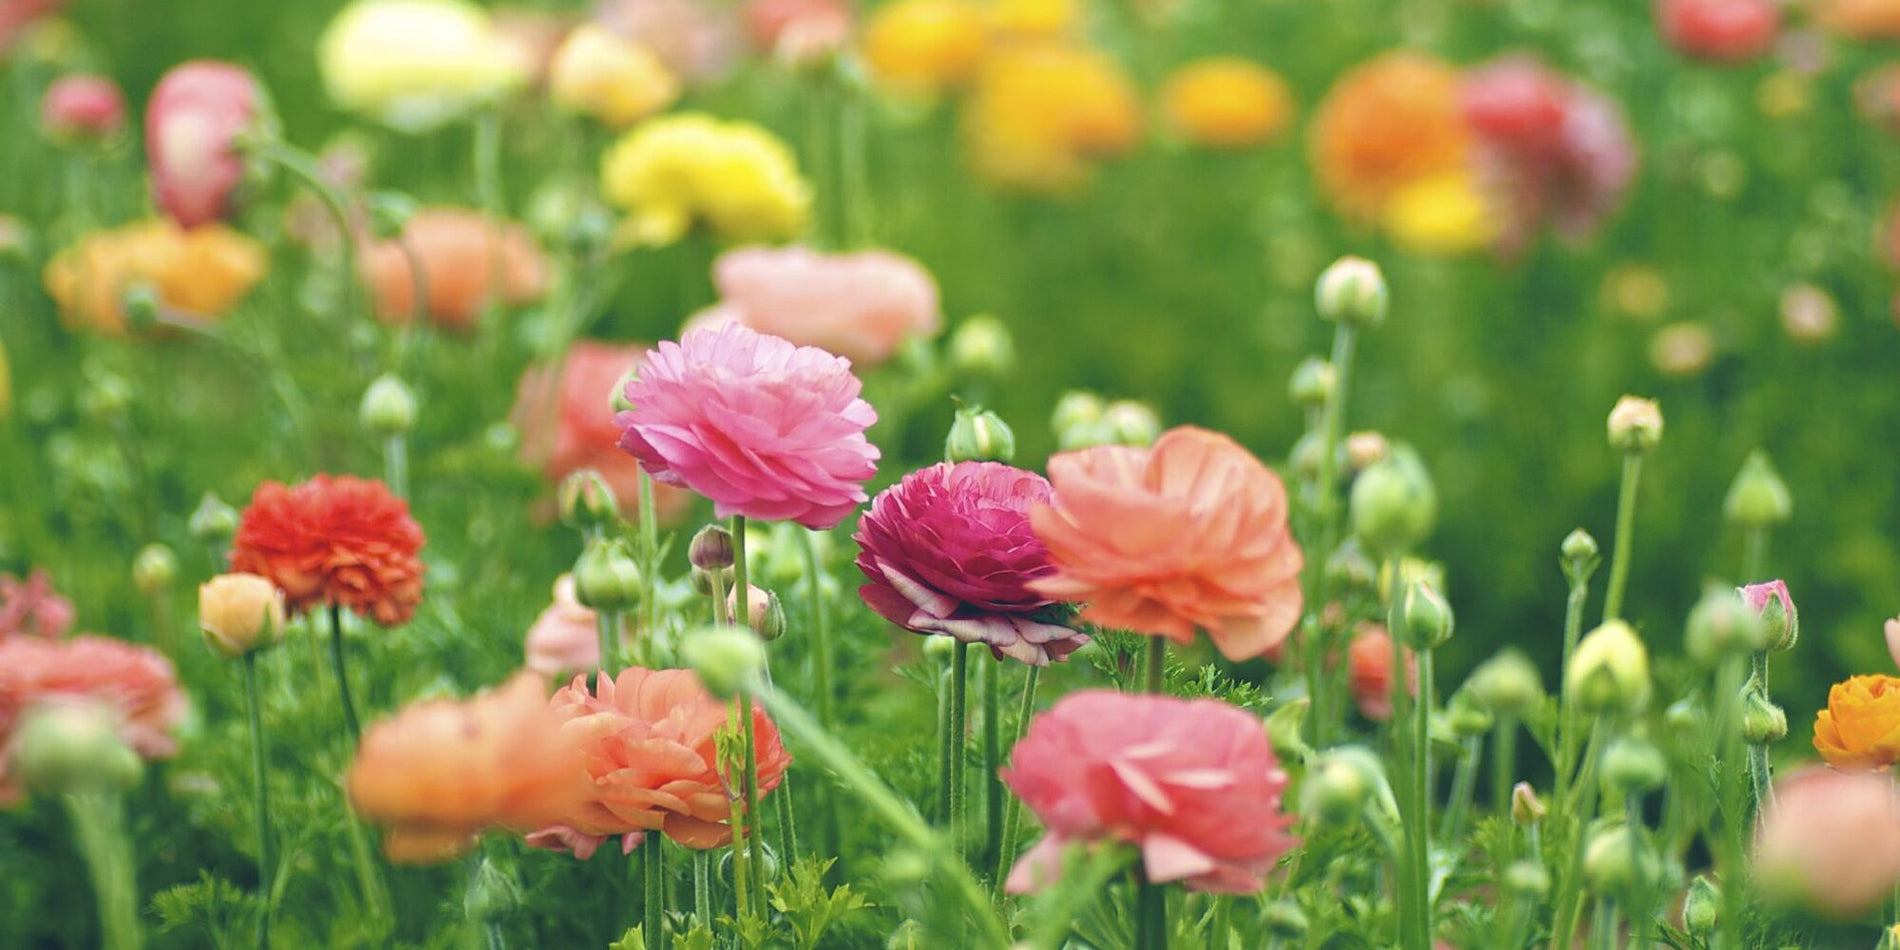
Ranunculus are cool season flowers that grow best in spring-like temperatures of about 55°F. In warm climates (zones 8-10), the corms are planted in the fall so they bloom in late winter or early spring. Plant ranunculus in beds and borders, cutting gardens and containers.
Plant the corms 5-8” apart and 2” deep with the claw side down. Alternatively, you may sprout the corms before planting them into the garden or into containers. In this case, fill a seed tray with about 1" of damp growing mix. Position pre-soaked corms (see below) closely together on top of the mix and cover with another 1" of moist growing mix. Keep tray in a dark place for 10 days at 50-60°F. When white roots are visible, the corms are ready to plant.
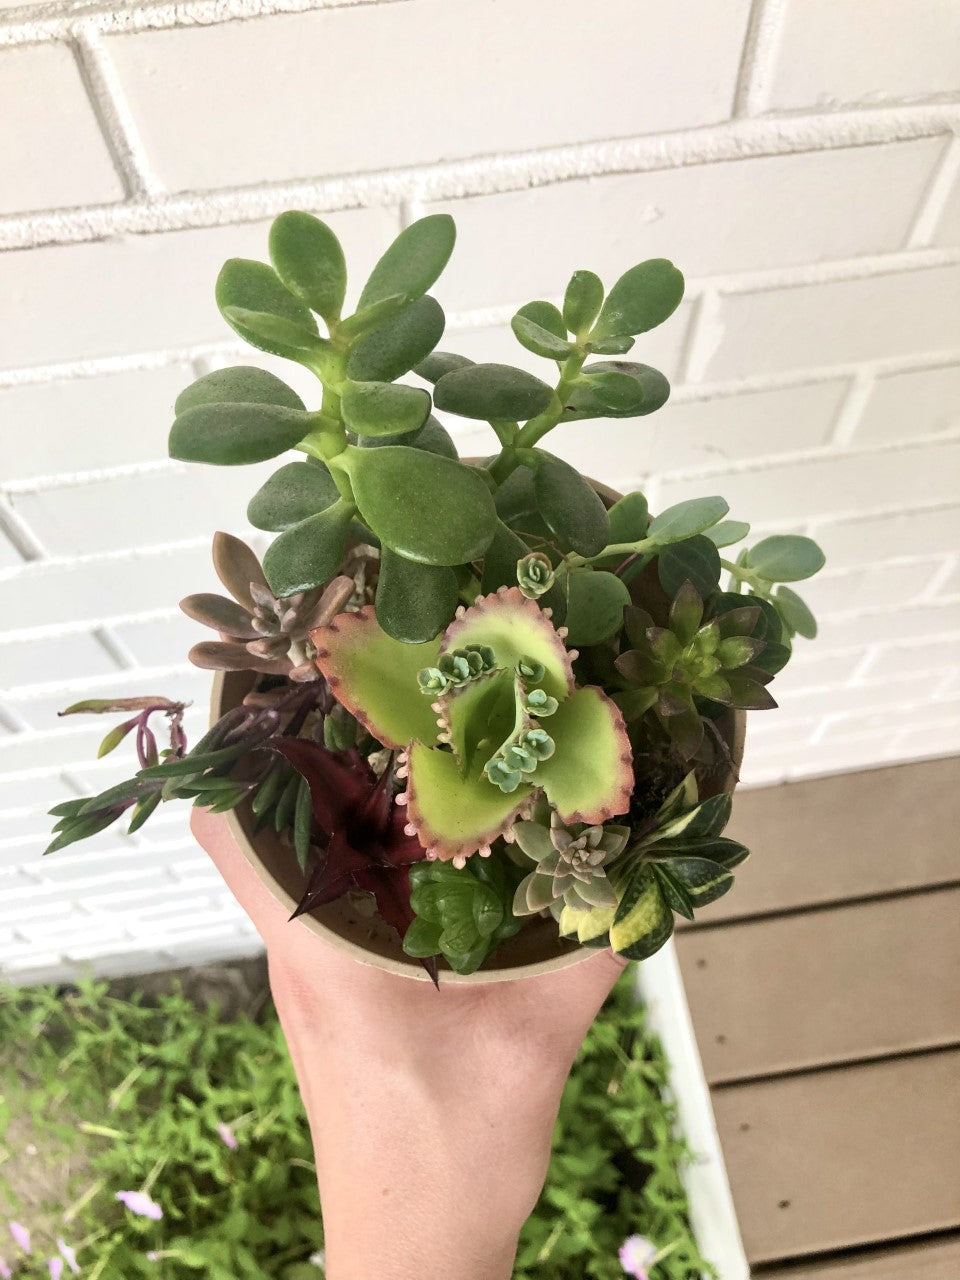
To plant cuttings, make sure that you have enough of the stem to plant beneath the soil to support the plant. Remove any extra leaves from the bottom of the stem.
For large cuttings, about an inch of bare stem is fine. Ensure that the bottom of the cutting has been dried out and formed a "callous".
Plant succulents in a well draining potting soil mixture, adding small stones to help with drainage. Plant about 1" deep in the soil and watch your new baby cacti and succulents grow flourish!
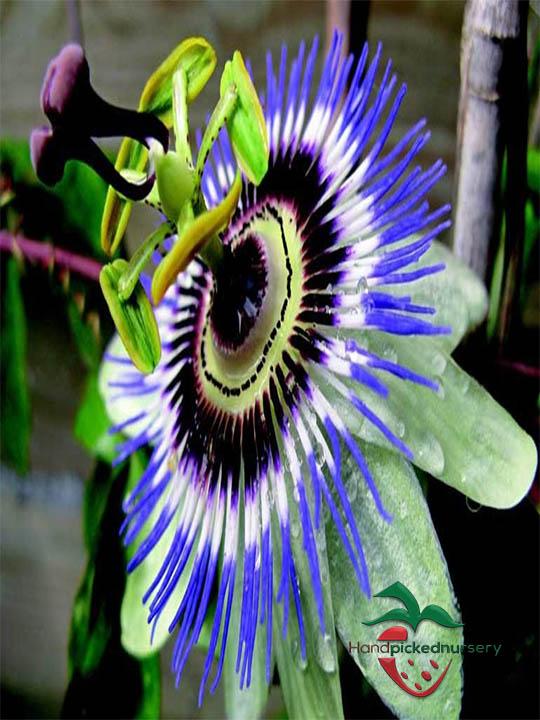
When you first receive your plants, I would start them indoors for a couple of weeks near a window to get plenty of light. A consistent environment will help the roots to settle in their new home. Spring time is best time to plant a passionfruit vine. Before you plant, prepare your soil by incorporating rich compost (and chicken manure if you have it) to an area around one to two yards wide. Dig a hole twice as wide and just as deep as the root ball, gently tease the roots, plant the vine and water well. Passion fruit vines propagated by either method take two to three years to reach maturity, flower and begin to bear fruit. Passionfruit vines are heavy feeders and need plenty of water and well-drained soil. Add mulch around the root system, to reduce evaporation and protect it from the hot sun. Leave the vine to climb in its first year, then pinch out the top bud to encourage lots of side shoots.
There are so many kinds of seeds and would be impossible to list them all. Click the blue button. Then at YouTube put in the search bar your seed name and planting instructions and you will find many videos to help you.
Make sure to watch more than one so you can find video that has the supplies you use.
Work in 10-12 inches of compost to a soil depth of 8-10 inches. Wasabi requires a neutral or slightly acidic soil pH of 6-7. Plant your start only deep enough to keep it upright. Being sure that all of the roots are covered, back fill the hole and gently press into place. They actually do well indoors in a cool place in the house and they love LED lighting about 3 feet away.